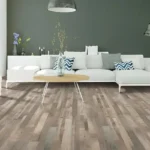

At M S Flooring Inc, laminate flooring is one of the most popular choices for homeowners seeking a stylish, durable, and cost-effective option. While professional installation is always recommended for the best results, some DIY enthusiasts choose to tackle laminate installation themselves.
If you’re considering installing laminate flooring, here’s a step-by-step guide to help you get started.
Proper preparation is key to a successful installation. Start by clearing the room of all furniture and removing existing flooring if necessary.
Before you begin, make sure you have the following tools and materials:
Most laminate flooring requires an underlayment for cushioning, moisture resistance, and soundproofing. Roll out the underlayment across the subfloor, ensuring there are no gaps or overlaps. Secure it with tape if needed.
Decide the direction in which you’ll install the laminate planks. Running them parallel to the longest wall or the main light source typically provides the best aesthetic. Measure the width of the room and calculate how many planks you’ll need.
Trim the first row of planks if necessary to avoid uneven pieces in the final row.
Begin in a corner of the room, placing spacers between the wall and the first row of planks to allow for expansion.
Repeat the process, row by row, ensuring each plank is securely locked into place. Maintain the spacers along the walls and check for gaps as you go.
Once all the planks are in place, remove the spacers and install baseboards or quarter-round molding to cover the expansion gap along the walls. This step ensures a polished, professional look.
Installing laminate flooring requires precision and patience, but the results can transform your space. If you’d prefer professional installation or have questions about the process, our team is here to help.
For high-quality laminate flooring in Riverside, CA, visit M S Flooring Inc. As a trusted laminate flooring dealer in Riverside, CA, we provide a wide selection of laminate in Riverside, CA, and expert advice to ensure your project is a success.
Let us help you achieve the flooring you’ve always wanted.


